Step 1. login to google developers Console
login to google developers Console at https://cloud.google.com/
If you don't already have a Google account you'll need to make one first, but you probably do.


Click create a new project and give it whatever project name you want.

Click on the project and then click on Compute Engine
It will prompt you to enable billing


Click submit
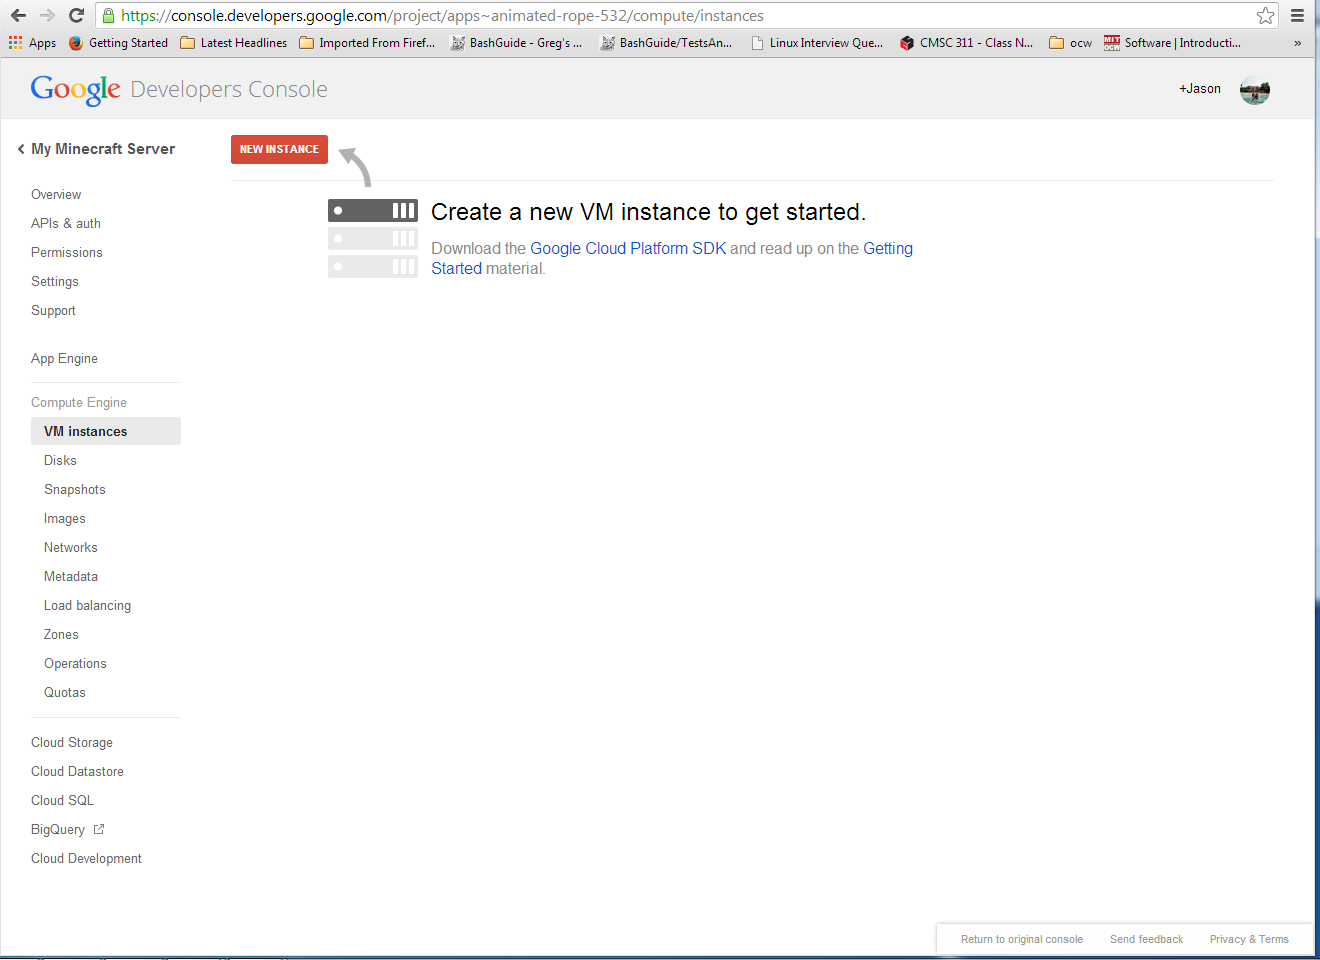
Click on new instance


Machine Type> high cpu 2 core 1.8 G mem .08 cents / hour
boot source > new persistent disk from image
image > debian 7 image
Leave all other options default and hit create

Download cygwin at http://cygwin.com/install.html
Download and install the 32 bit version for windows (the 64 bit has a bug apparently) http://cygwin.com/setup-x86.exe

Choose all the default settings

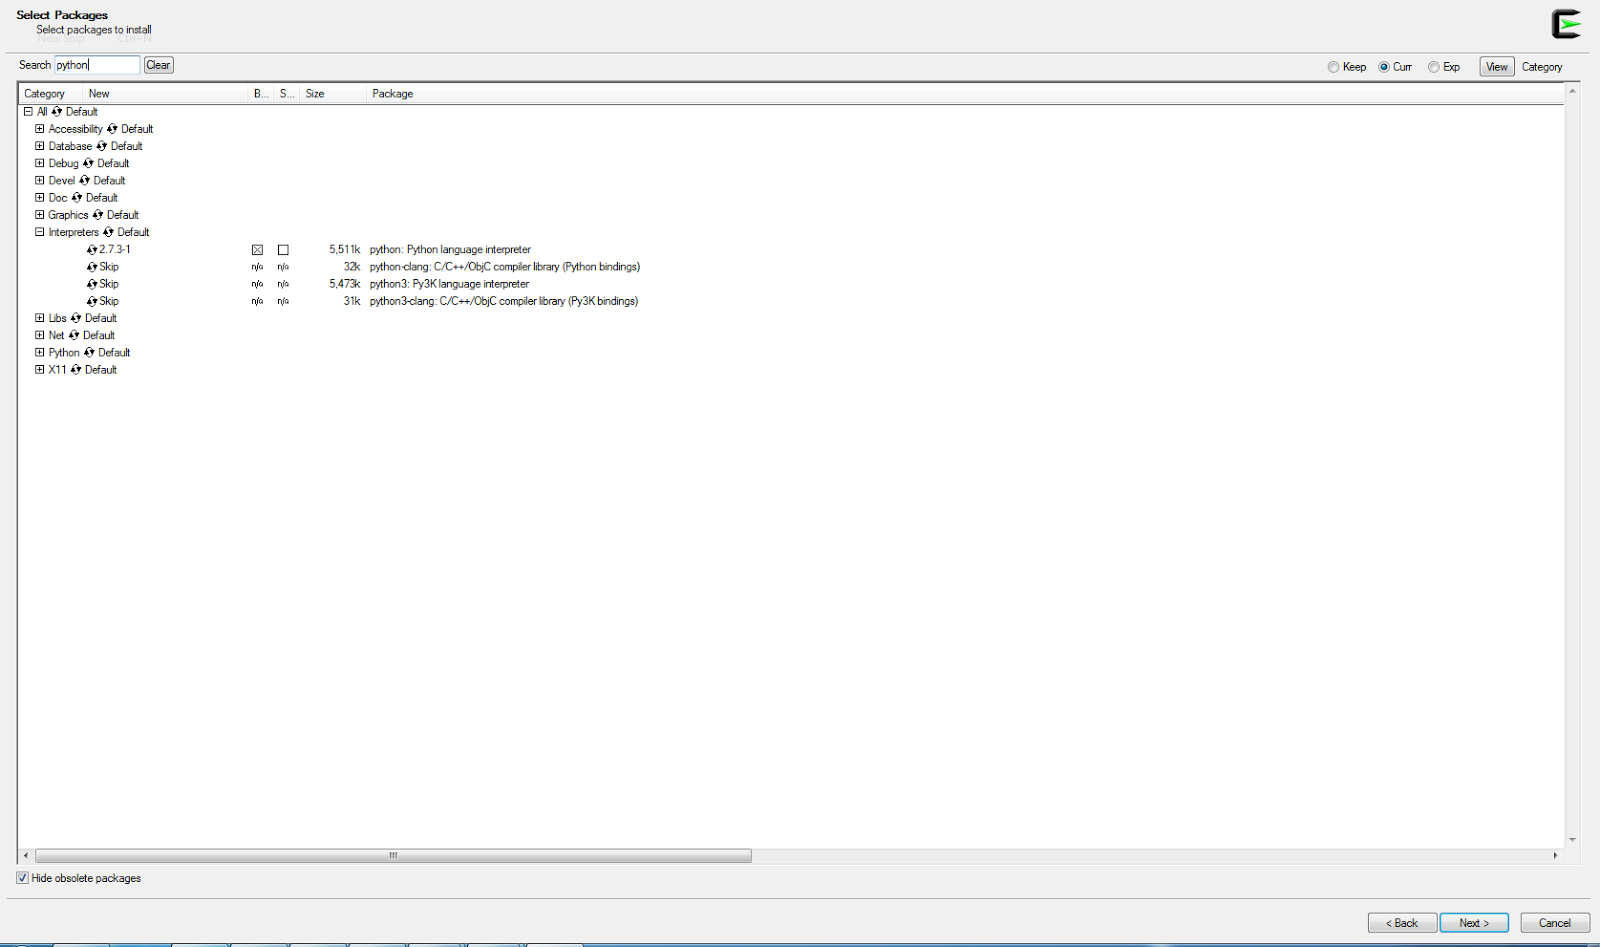
When installing Cygwin, be sure to select openssh, curl, and the latest 2.6.x or 2.7.x version of python from the package selection screen.
I'll make the next screenshots bigger because the text is really small...


(At this point I was thinking "why can’t I just ssh in from my browser or get a console screen?" but whatever I guess..)

Step 4. Install Google Cloud SDK
In windows run start>programs>cygwin>terminal
In the terminal run (or copy and paste)
curl https://dl.google.com/dl/cloudsdk/release/install_google_cloud_sdk.bash | bash
Select y and accept defaults, when it completes, close and reopen the cygwin terminal

Paste the url it creates into your browser and hit accept at the Google screen
Get the code the website generates and past it back into your terminal

Step 5. Log into your VM
In your cygwin terminal run
$ gcutil --project=YOURPROJECTID ssh YOURVMNAME (this is how you will log into your VM from now on)
Enter pass phrase if you want to set up a password for your ssh keys
Ok, now your logged in
Step 6. Install Java
In your terminal (you should be logged into your VM at this point) run
sudo su -
apt-get install openjdk-7-jre
Hit 'y' or accept for any questions it asks you. This will download and install Java which is required for running minecraft
exit (run exit only once or you'll have to log back into your VM)
Step 7. Install Minecraft
In your terminal (still logged into your VM) run the following commands
mkdir minecraft (makes a minecraft directory)
cd minecraft (moves you into the minecraft directory)
wget https://s3.amazonaws.com/Minecraft.Download/versions/1.7.5/minecraft_server.1.7.5.jar (downloads the minecraft jar file)
java -jar minecraft_server.jar nogui (starts the minecraft server)
Once you run the java command you should see alot of text pop up about starting worlds and listening on port *.25565, etc, and finally you'll start to see console output from the server.

Although you get a public IP address with your VM it only allow connections from the outside world on port 22 (ssh) so you'll need to add a new firewall rule.
In the developers console click on your vm then Compute Engine and then Networks.
Under firewall rules click new rule and enter the information for your server. Basically just give the rule a name and under ports and protocols put tcp:25565 or whatever port your minecraft server is listening on (it shows you when you start the server (step 7))
Click create to save the setting

To get your VM IP click on the VM in Compute Engine under your project in the Google Developers Console. Under the usage statistics it should show your external IP. This is the IP you add into Minecraft and the IP you give your friends.
If all goes well you should connect to your Minecraft server and be able to start playing.
Afterthoughts:
If you've read this far you have some patience which you'll need to use Google's Compute Engine. It doesn't really seem to be made for everyday people just trying to run a server for their kid to play minecraft on, but it does work and very well too. That being said there's a few things you should know.
1. You can't turn your server off and leave it off. You can do a restart on it, but if you give it a shut down only command (i.e. shutdown, poweroff, init 0) it will go into a terminated state. (I learned the hard way) If this happens you'll have to delete the VM (but don't delete your persistent disk) and make a new instance an which point you can reattach the disk that already has Minecraft on it.
2. This is probably more difficult than running on AWS, and maybe more so than azure. Mainly because on windows you don't have a terminal and so you need cygwin and Google Cloud SDK. They should really build a way to log in via the developer console.
3. Unless your kid plays Minecraft most days of the week, or you want to let their friends play even when your kid isn't playing this isn't really cost effective. Leaving the machine running 24/7 will be about 40 bucks a month with the type of server I created. That's alot to pay every month for Minecraft. If they only play on the weekends though it isn't so bad as you can shutdown and delete the instance on Sunday night and restart it on Friday after school and this will save you alot of money. It will be more difficult though because you'll be recreating the VM every week and possibly updating the IP address for yourself and your kids friends.
All in all it was a fun experience to try and it does work so hopefully someone else will be able to try it too now.
If you have any questions leave them at the bottom and maybe I can help you out.
Great Post, I love to read articles that are informative and actually have good content. Thank you for sharing your experiences and I look forward to reading more.
ReplyDeleteRyan Levin
Great tutorial - thanks for the help.
ReplyDeleteI was in quest of various topics that are enough well-liked and lastly got your blog, it has outstanding topics with immense popularity. minecraft hosting
ReplyDeleteYour estimate of $40/month was spot on... Curious what the best way is to schedule/automated the uptime for the VM to align with allowed "screentime"
ReplyDeleteHi unknown, I don't really know of a way to automatically stop and then later restart your VM without having to reattach the disk. What you could do though is set up a cron job within the VM itself that will stop the minecraft instance when you want (sunday night for instance) and then restart it when you want (friday evening). Here's a decent guide on setting up cron jobs http://www.cyberciti.biz/faq/how-do-i-add-jobs-to-cron-under-linux-or-unix-oses/
DeleteLooking for a good minecraft server!?
ReplyDeleteMinecraft Vanilla Server
You mean this one?
DeleteMinecraft Survival Servers
Take your first step towards Cloud, Know what are the benefits of Cloud Servers from Zolute’s highly experienced professionals.
ReplyDeleteThanks for sharing info. Keep up the good work...We hope you will visit our blog often as we discuss topics of interest to you
ReplyDeleteatlauncher server hosting
I was surfing net and fortunately came across this site and found very interesting stuff here. Its really fun to read. I enjoyed a lot. Thanks for sharing this wonderful information.
ReplyDeleteMinecraft Server
You make so many great points here that I read your article a couple of times. Your views are in accordance with my own for the most part. This is great content for your readers. Free Minecraft Players
ReplyDeletefabulous articles..thanks for sharing your thoughts and knowledges to us
ReplyDeleteFull Stack Training in Chennai | Certification | Online Training Course | Full Stack Training in Bangalore | Certification | Online Training Course | Full Stack Training in Hyderabad | Certification | Online Training Course | Full Stack Training in Pune | Certification | Online Training Course | Full Stack Training | Certification | Full Stack Online Training Course